Planning for the Lost Coast Trail
From a new(ish) backpacker who is trying to plan the Ultimate Trip

This was my very first longer than 5 miles backpacking. alone!!!! I was so nervous but so excited to be there and see all the things I read online. I tried to compile all the information I gathered in the best way I could in a blogpost. Feels like it’s early 2010 and I just watched Julie & Julia for the 3rd time in a row.
1. Secure Your Permit (Well in Advance)
To protect the fragile ecosystem and manage foot traffic, the Bureau of Land Management (BLM) requires permits for overnight trips on the Lost Coast Trail. These are limited and tend to sell out fast, especially for spring and summer weekends.
Steps to get a permit:
Visit Recreation.gov.
Search for “King Range Wilderness Permit.”
Select your entry date (this is the first day of your trip).
Each hiker must be listed on the permit.
Cost: ~$12 per permit (subject to change).
Total cost was $30 including reservation and non-refundable amount.
Remember: Permits become available exactly 6 months in advance, and the most popular dates can disappear within minutes. There are a 3 walk-in permits at the Ranger Station. 1 permit/person if you opt for walk-in.
2. Understand the Tides – This Trail Is Not Like Others
Portions of the Lost Coast Trail are impassable during high tide—there’s simply nowhere to walk but into the ocean. These “impassable zones” must be carefully timed with low tide.
How to plan with the tide:
Visit NOAA Tide Charts and select Shelter Cove, CA or nearby.
Visit The Lost Coast Trail Interactive Tide Chart to plan the trail by day
Note that low tide is your friend—plan to hike the impassable sections within a 2–3 hour window around low tide.
There are three main impassable zones between Mattole and Black Sands Beach—plan your camp and hiking segments accordingly.
Remember: Print or download the tide charts ahead of time—there’s no cell signal on the trail.
How did I interpret the chart?
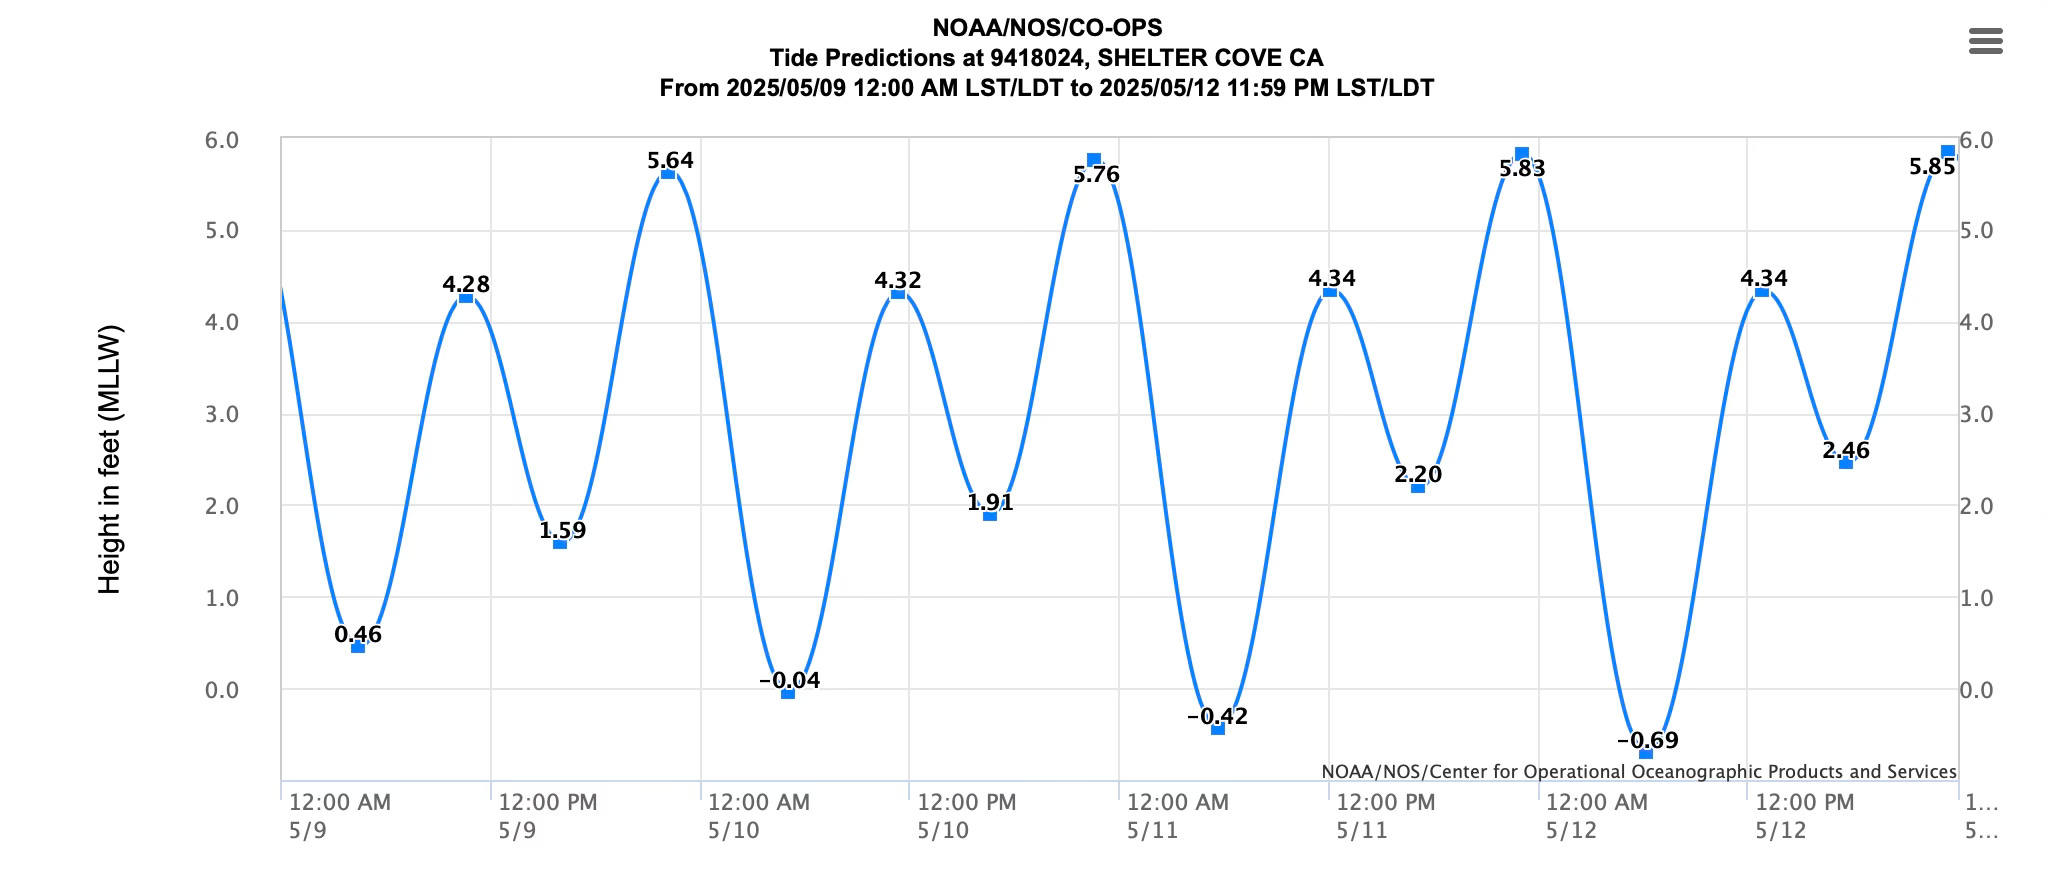
NOAA Tide Charts plotted daily for the my trip
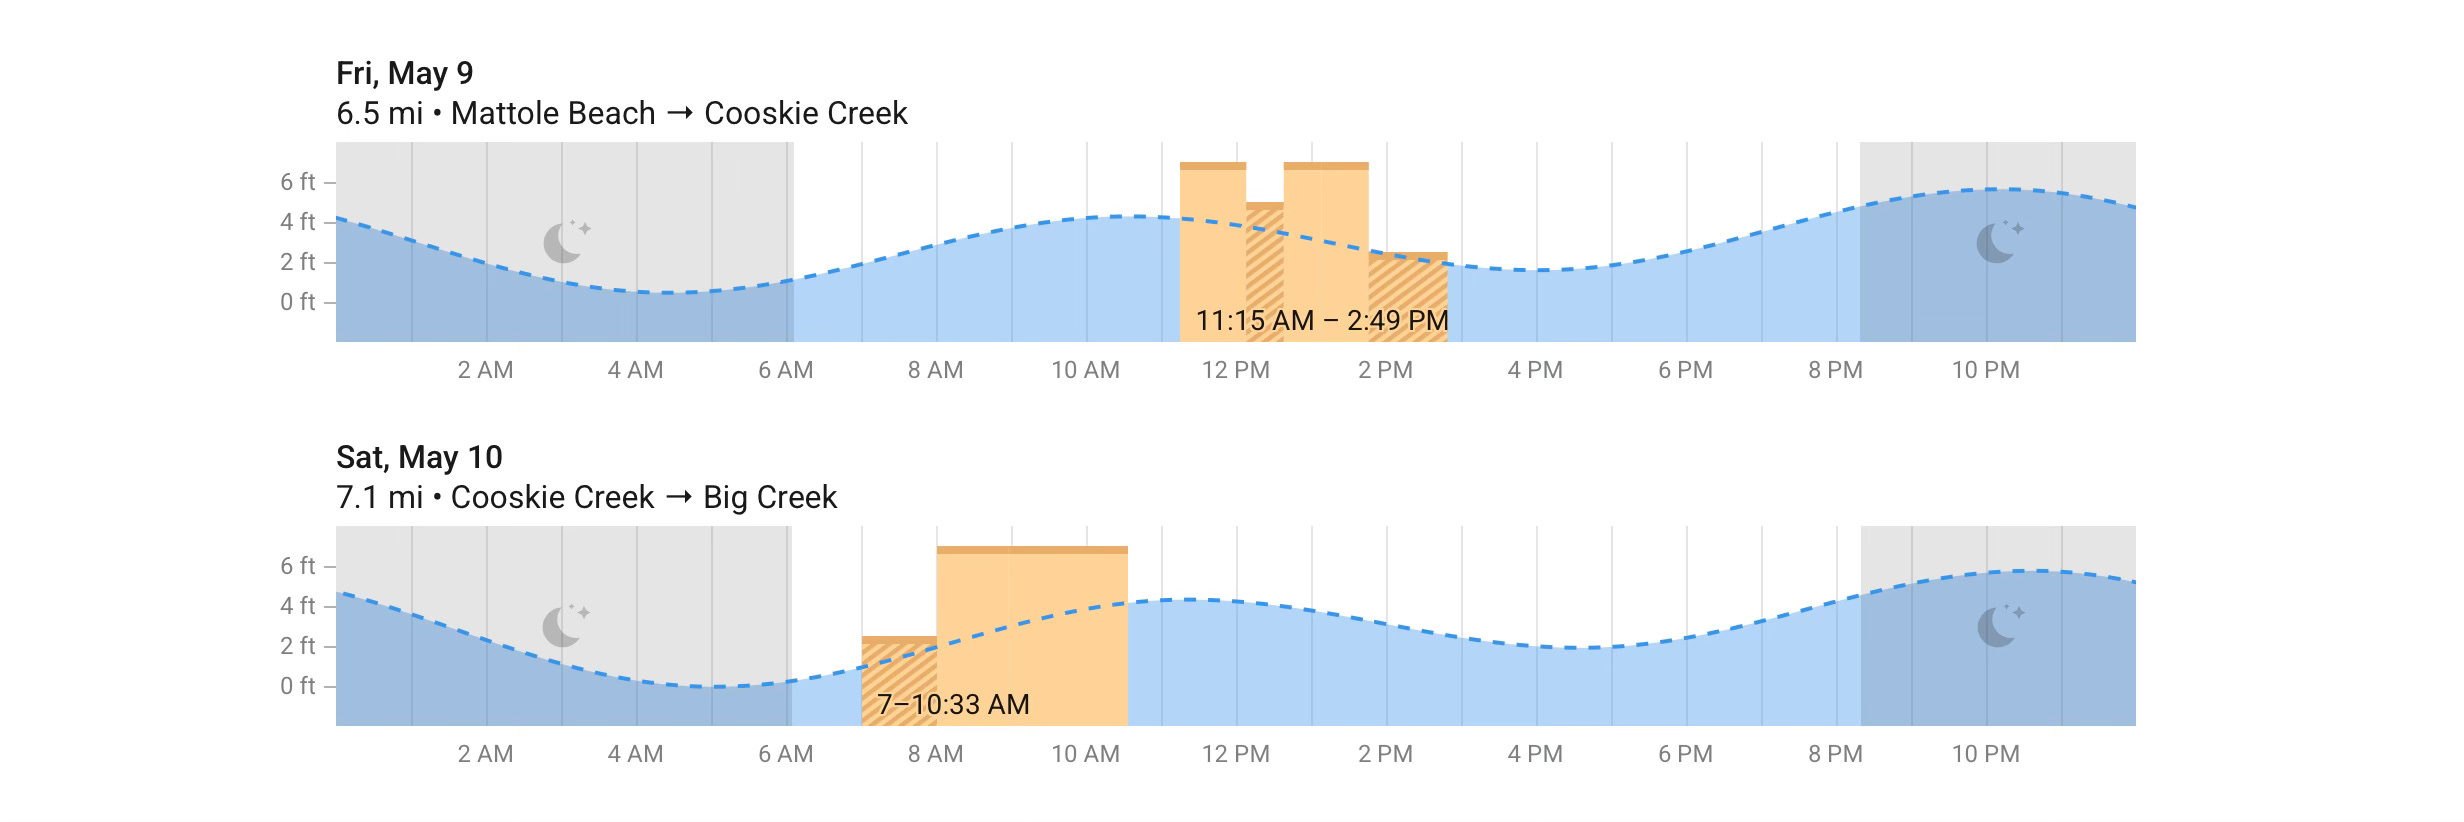
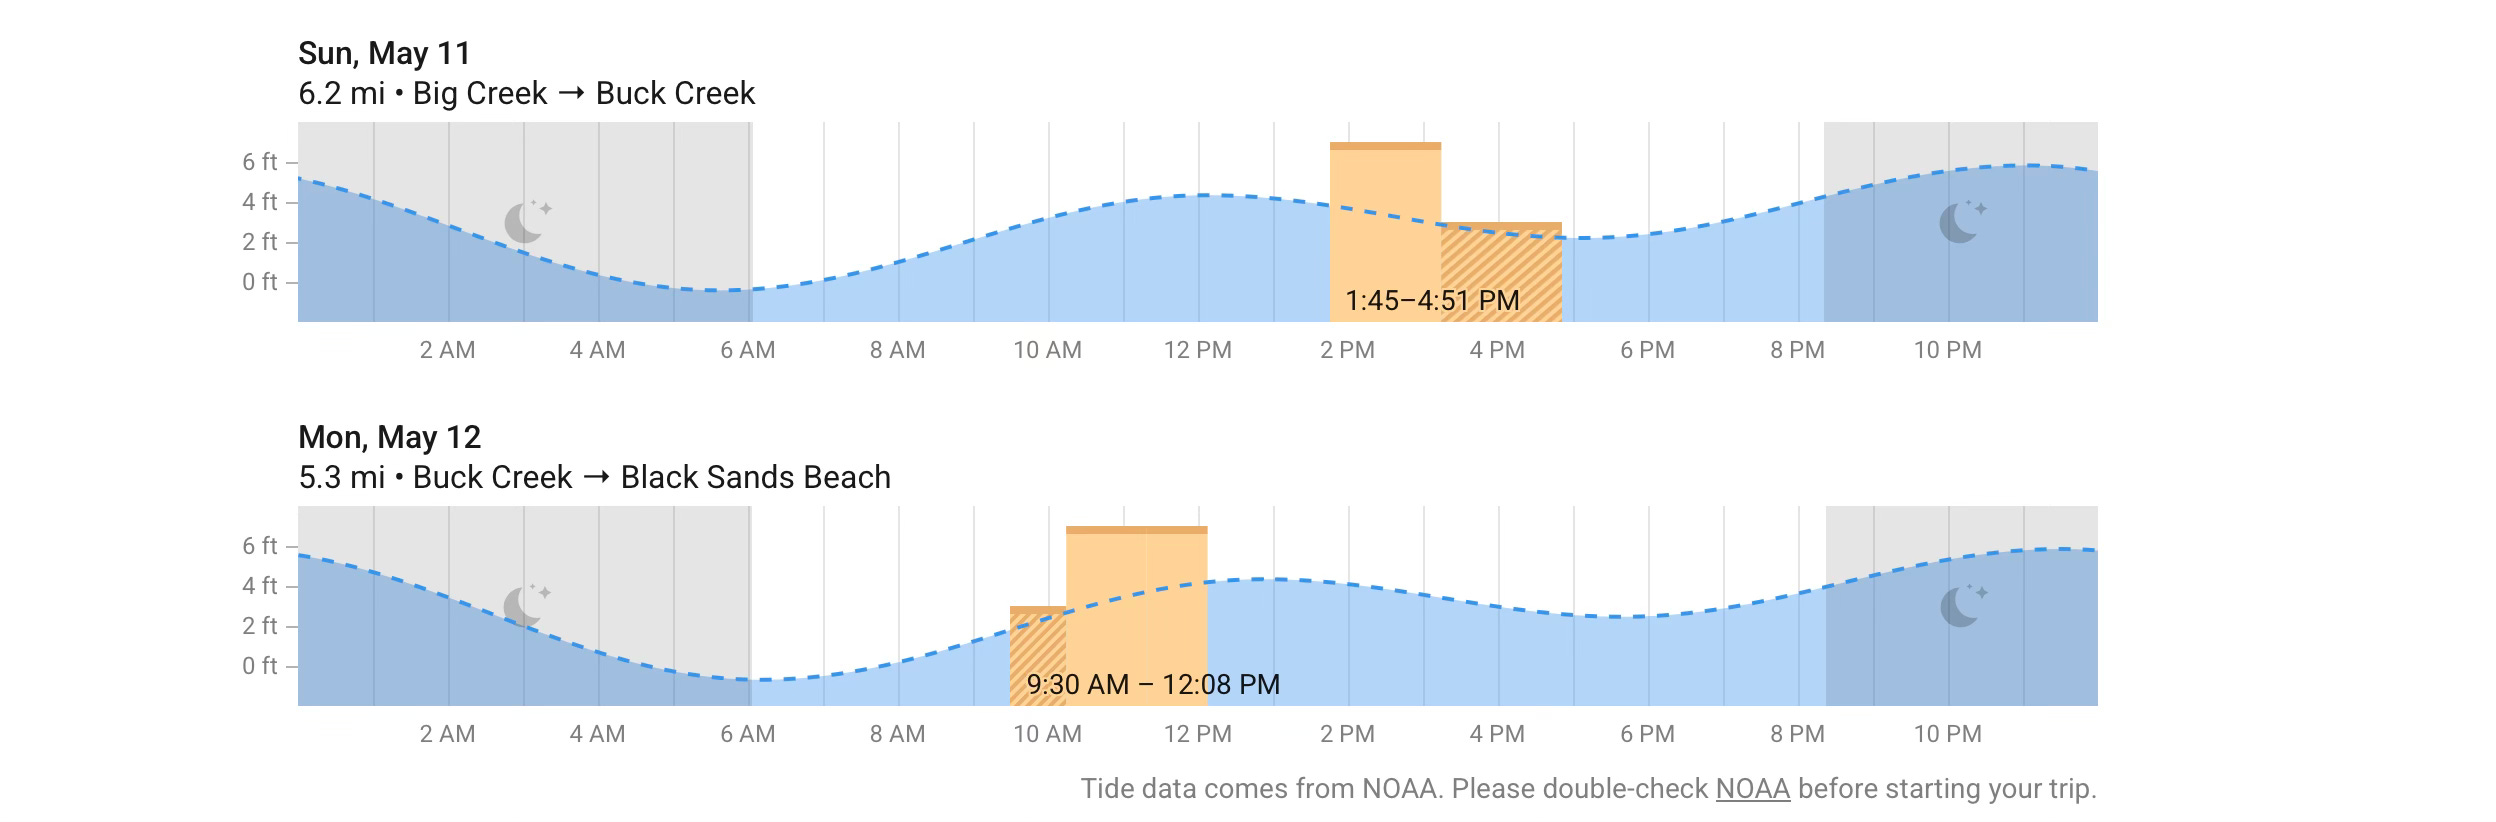
The Lost Coast Trail Interactive Tide Chart for each day on the trail

The Tide Time Frame chart I made for my own reference
3. Plan Your Route and Campsites
The traditional southbound route starts at Mattole Beach and ends at Black Sands Beach in Shelter Cove. Most hikers take 3–4 days to complete the trail.
My tentative 4-Day Itinerary:
Day 1: Mattole Beach to Cooskie Creek (~6.5 miles)
Day 2: Cooskie Creek to Big Creek (~7.1 miles)
Day 3: Big Creek to Buck Creek (~8 miles)
Day 3: Buck Creek to Black Sands Beach (~5.3 miles)
Campsite Notes:
Campsites are informal—look for flat, dry areas above the high tide line.
Bear-proof food storage is required (see gear below).
Remember: Avoid camping in the intertidal zone. Rogue waves are no joke.
Caltopo Mapping: It was my first time using Caltopo. As I couldn’t find many pictures of the campsite and that they are not marked at all on the trail. It was important for me to mark the sites on my map to estimate when I should look for clear ground and signs for a campsite.
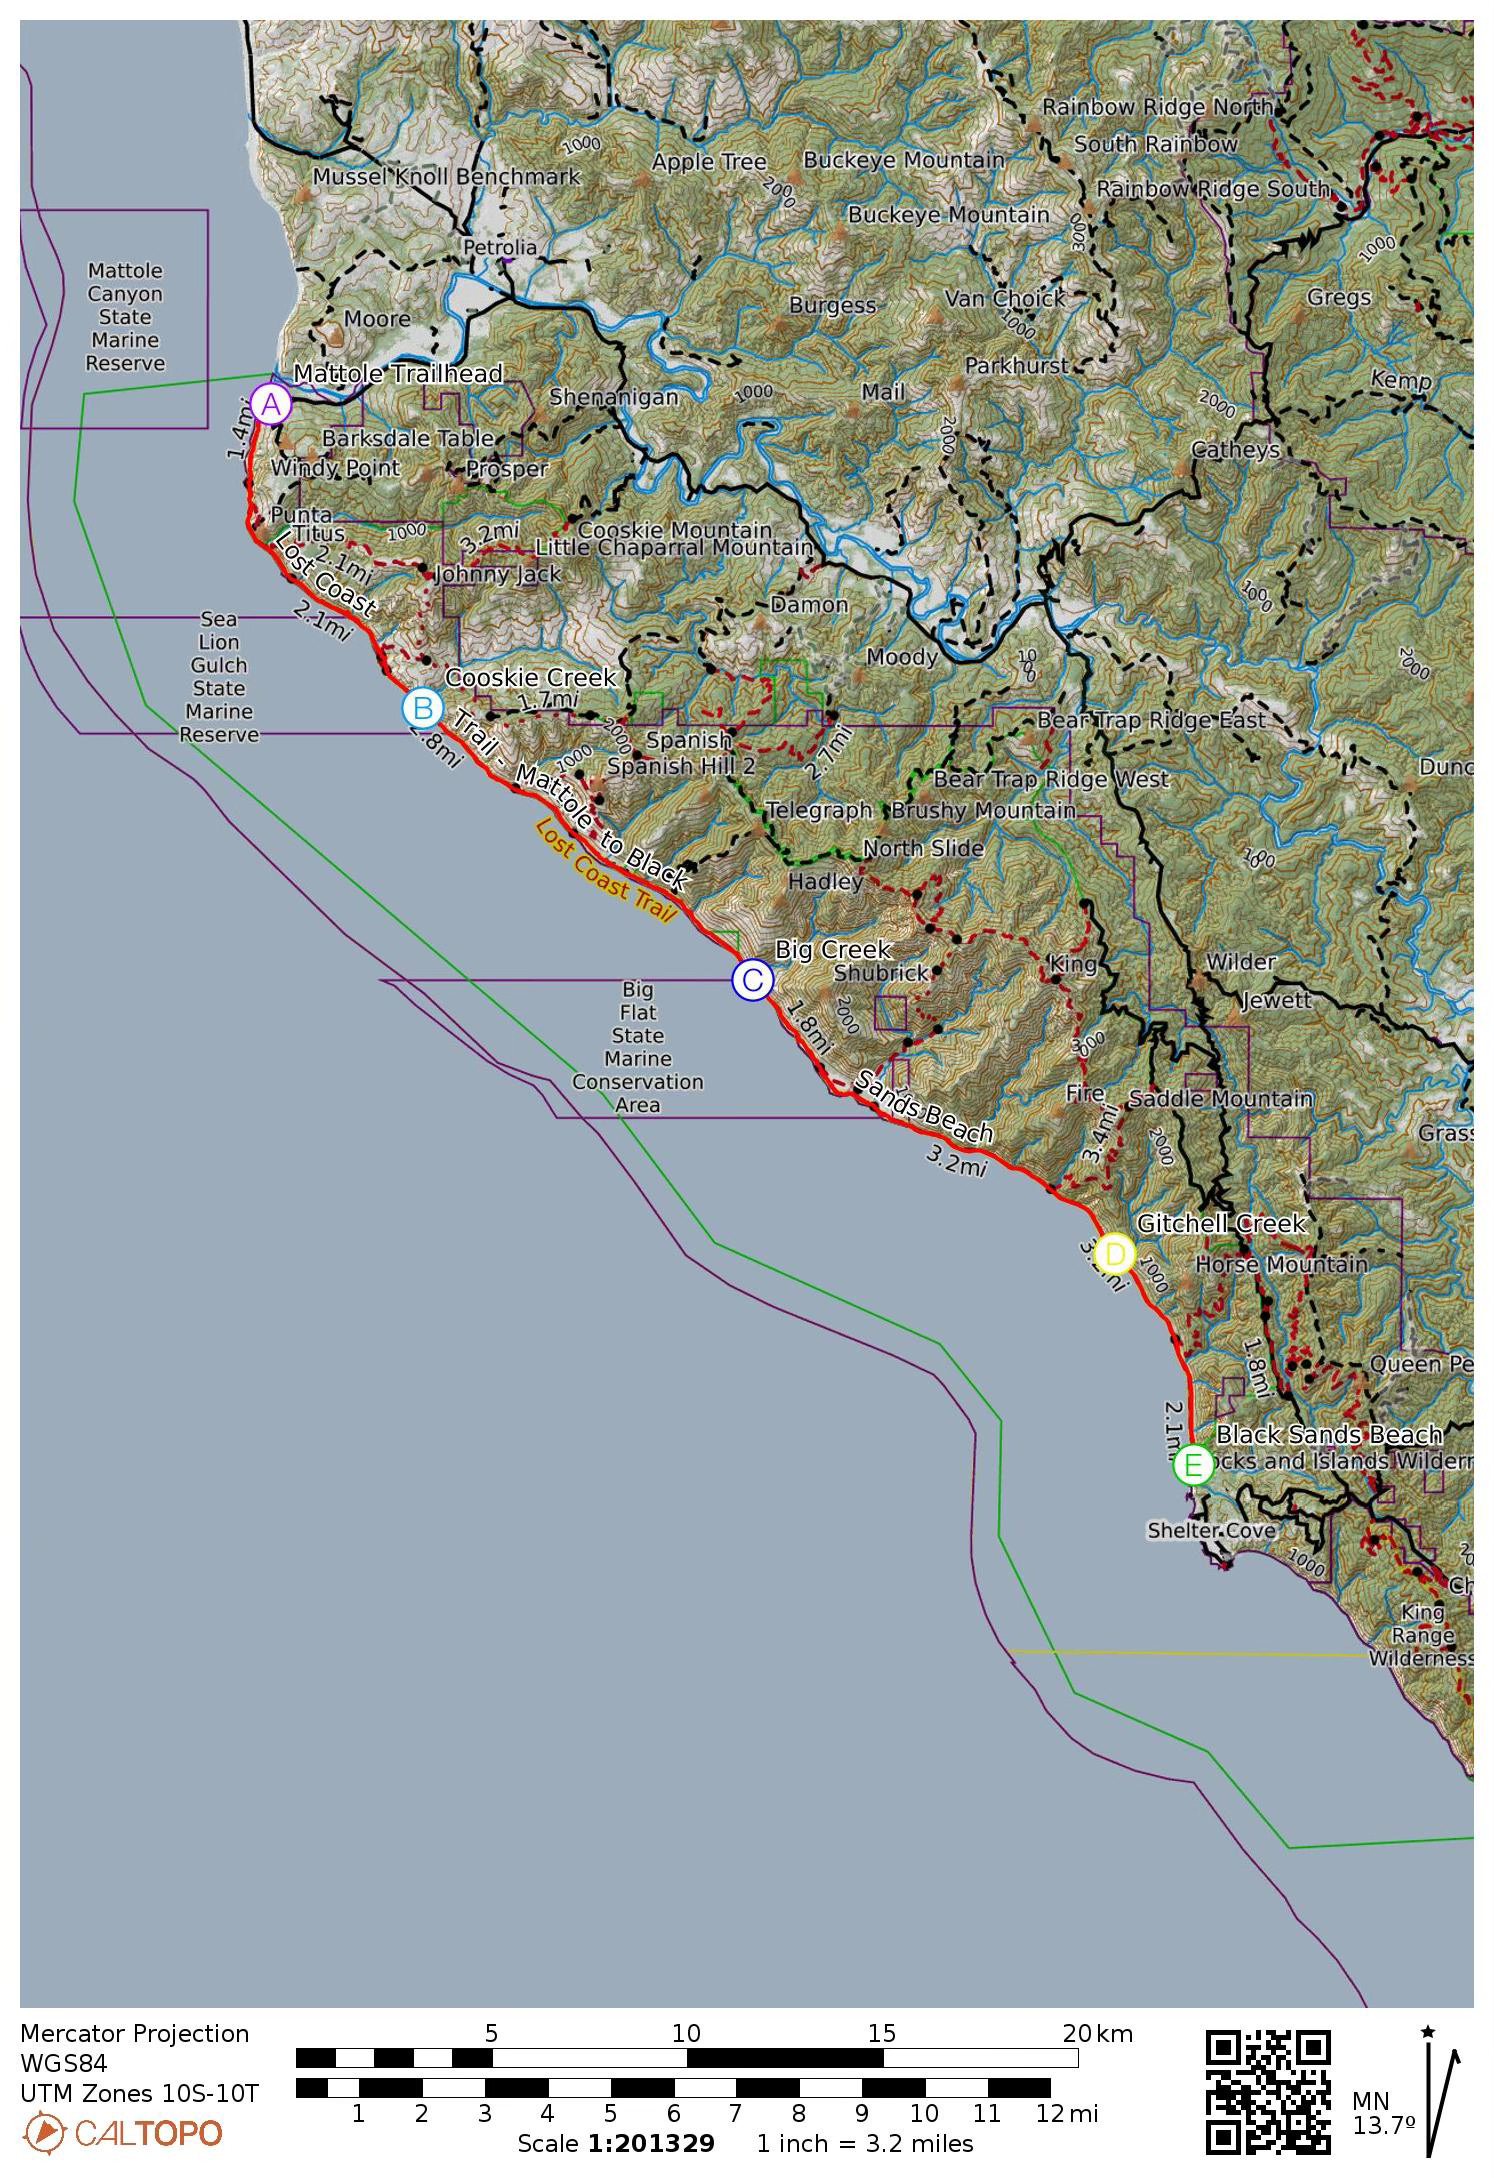
Link to the Caltopo map I made for my own reference on the trail - https://caltopo.com/m/6113VG0
For backup, I had the same map on Gaia GPS as well.
4. Shuttle and Transportation Logistics
Since the trail is point-to-point, you'll need a way back to your car. Unless you plan to hike and make it a loop.
Options:
Book a shuttle: Companies like Lost Coast Adventure Tours and Redwoods Shuttle offer reliable rides.
Self-shuttle with two vehicles (not ideal due to the long drive and rugged roads).
Remember: Park at Black Sands Beach and shuttle to Mattole. That way, your car is waiting when you finish.
5. Essential Gear Checklist
This isn’t a casual beach walk—it’s rugged, remote, and unforgiving if you’re underprepared.
Must-have gear:
Bear canister (required): Rental available from BLM or shuttle providers.
Good backpacking tent: Prepare for wind and wet fog.
Tide chart (printed or saved offline).
GPS or map + compass: Gaia GPS and CalTopo were my two picks
Water filter: Streams are available but need treatment.
Trekking poles: Helpful for slippery rocks and uneven terrain.
Waterproof shoes or sandals: Some stream crossings are unavoidable.
Warm layers: It gets chilly, even in summer.
Rain gear: Fog and drizzle are common.
Expect to hike on sand, pebbles, and rocks—trail runners with gaiters work well for many.